Health Intelligence Built for Your Practice
Biocanic is the technology platform that enables you to take on and manage more clients, all while driving better engagement and outcomes for each person you touch.

What our practitioners say
"By integrating Biocanic and my CRM system I was easily able to enroll over 400 clients into my Gut Health Restoration program in less than 4 weeks coming off of my online virtual summit"

"With Biocanic Max I was able to get rid of my antiquated EMR system and simplify my technology systems into one. This allowed me to not only scale my hybrid clinic, but I am now expanding to 3 more locations across the US."

"Biocanic is a critical component of my holistic fertility approach with my couples who are struggling to conceive. Biocanic seamlessly integrates the wearables, assessments and labs that I use with my clients into a single, easy to use and review dashboard."

"With Biocanic's one of a kind integration to my CRM (Keap), I now have a full-service solution that allows me to seamlessly track, manage, convert prospects, and onboard clients without any administrative overhead that used to prevent me from scaling my business"

The integrative health industry’s only complete ecosystem
Practitioners are empowered to deliver data-driven recommendations to accelerate their client’s journey to optimal vitality.
What’s included:
- No complex user and storage limitations
- Unlimited client engagement; scale your practice
- Add on modules; customize your practice needs
Functional health programs can be complex and overwhelming
We simplified it all into a delightful and easy to use platform.
An integrated platform for integrative medicine
Cost effectively and seamlessly aggregate data, assess, discover, and track your clients’ health.
Get startedIntuitive and easy features
Biocanic’s platform parses out complex data into correlative insights lowering the need for trial and error, allowing practitioners to focus on clients.
Get started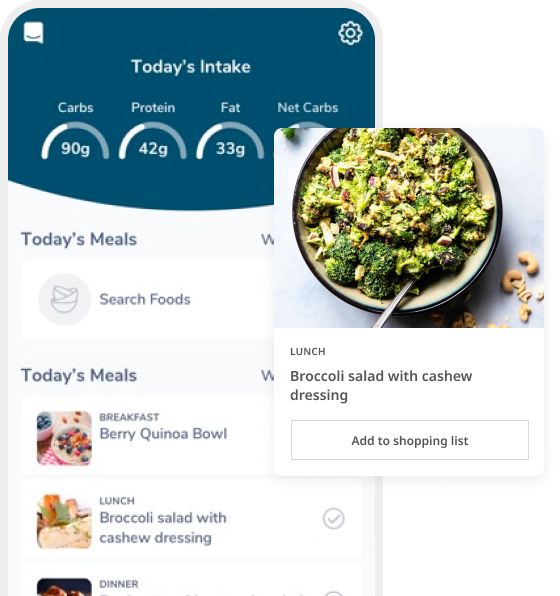
Every tool you need at your fingertips
Biocanic is unrivaled in functionality, partnership integrations, and a long term vision for the integrative health industry.
View available labs
Functional health programs can be complex and overwhelming
We simplified it all into a delightful and easy to use platform.
Features
Track any metrics you want to your clients to measure – diet, sleep, exercise or lifestyle
Health trackers are a simple and easy to use way to create objectivity and accountability to how your health program is impacting their goals and complaints that matter the most.
Learn moreAutomate your intake and assessment forms securely and easily from your clients
Biocanic makes it easy to request and collect all of the needed information from intake through to ongoing progress check ins. As simple as filling out an online survey, no more paper or spreadsheet-based forms, we make it simple and easy to manage all of the responses. See your assessment results tracked over time in the Client Functional Summary to ensure your client is on track.
Learn more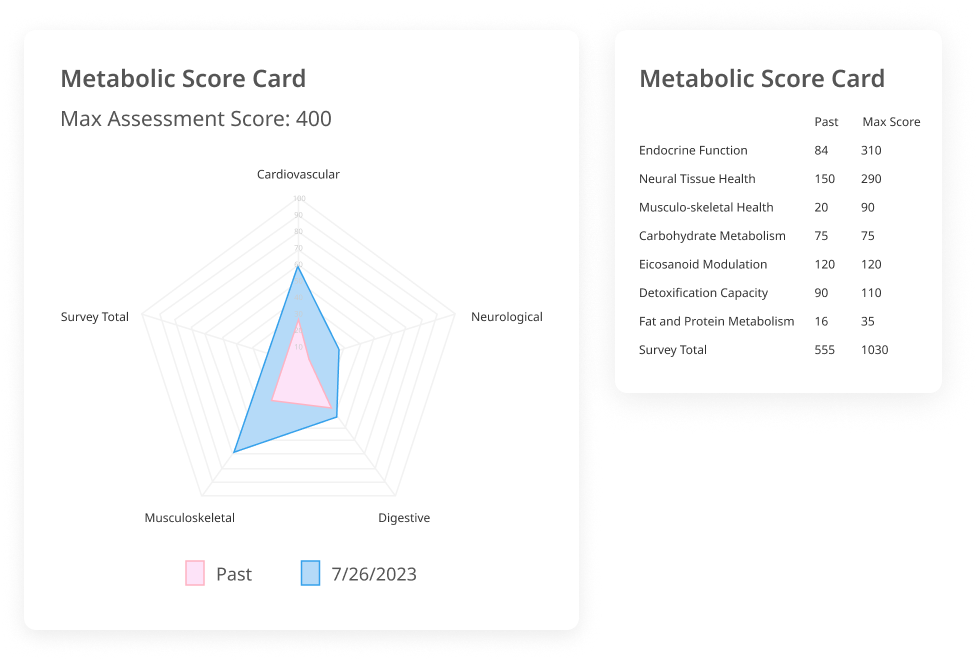
Supporting a wide range of lab tests
Functional health improvement programs can be challenging when you have different lab test results coming from a range of different lab providers. Correlation of the lab results with client complaints and goals requires a ton of time and focus to switch back and forth between reports. Biocanic automatically processes the functional lab test, and pulls out all the critical information and presents it alongside of all of the other information from the client.
Learn more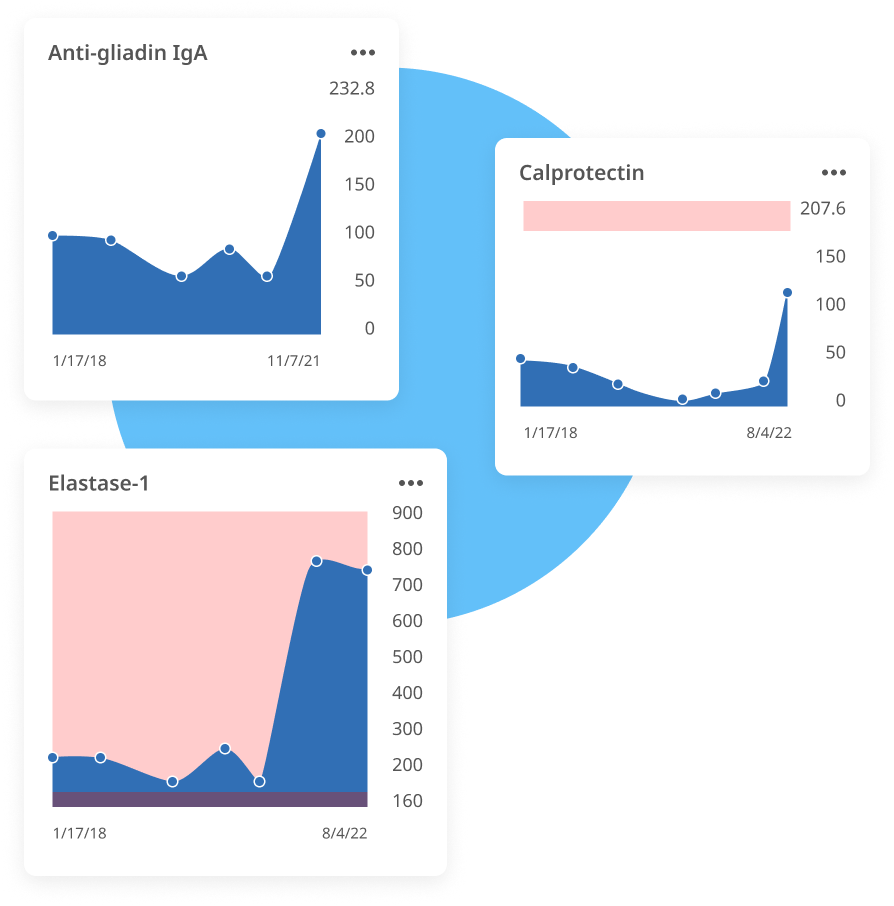
Save hours analyzing and correlating data from multiple assessment forms and labs
Finally, a holistic view of all your individual data in a single and easy to use spot. The Client Functional Summary aggregates all the information from the intake forms, assessments, and objective lab data to give you a snapshot view of where to focus, and how things are trending over time. This simple interface allows you to hone in on what’s going right and what needs to be improved for each individual without the need to have multiple documents, forms, and spreadsheets open. Speed the time it takes to understand what’s going on from a holistic perspective and get on the path to better health faster and more efficiently.
Learn more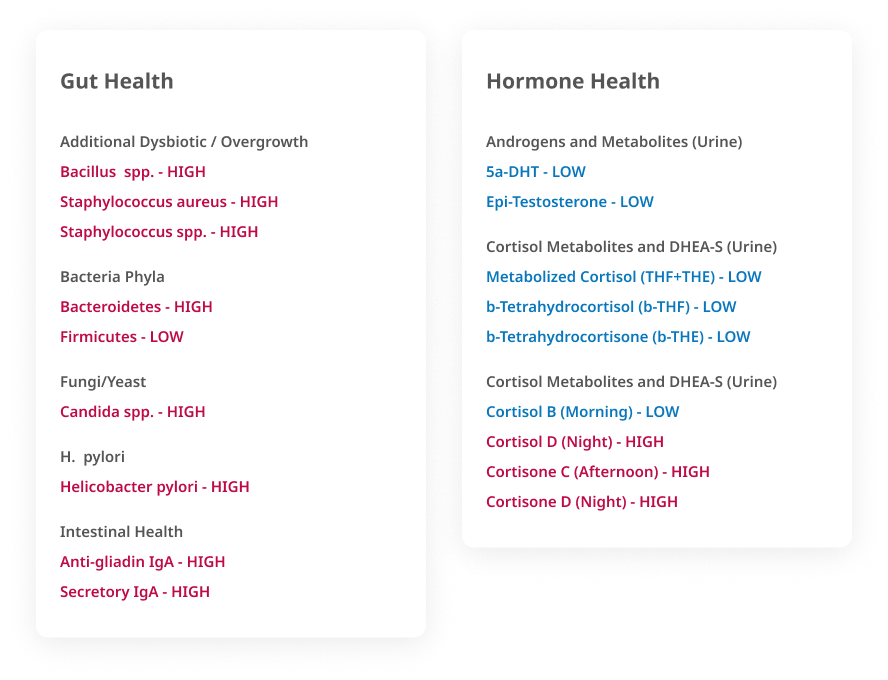
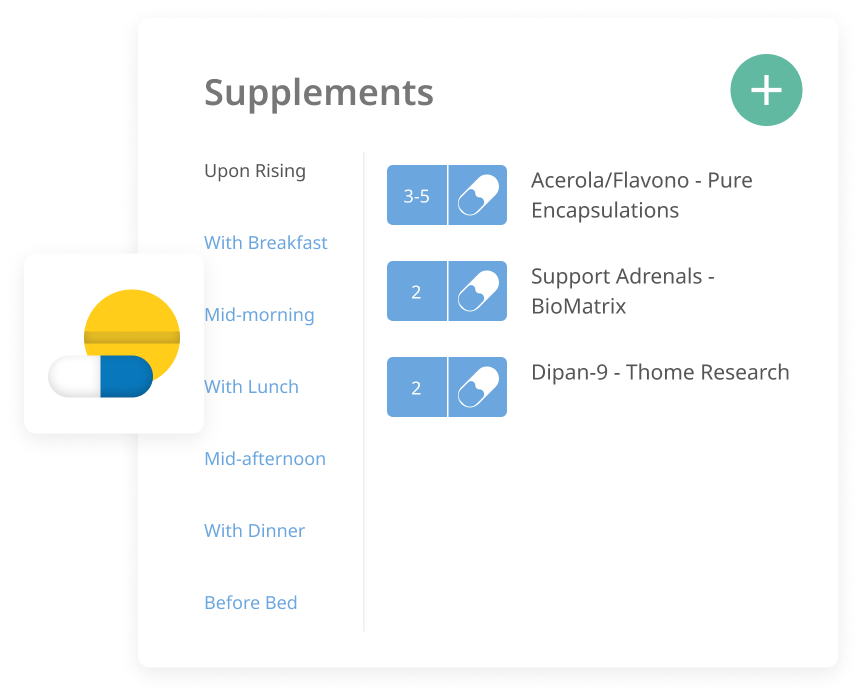
Build and assign templates with supplement program
With any functional health improvement program, dietary supplements are critical to supporting and achieving an individual’s health improvement goals. Biocanic allows you to build flexible supplement programs for each one of your clients. The platform easily allows you to work with any online dispensary, or ordering directly from your own inventory.
Learn more